Growth is a double edged sword. Unchecked, growth can be cancerous and destructive. It is this type of ceaseless expansion that has put our society into the precarious environmental and financial positions in which we currently find ourselves. On the other hand, growth can be regenerative and life-giving. Following a forest fire or a bitter winter, the first green shoots to emerge from the earth bear witness to the earth's ability to restore life in the wake of disaster.

My goal for this blog is pretty simple and open-ended: I want to document and share with family and friends my efforts to incorporate an ever increasing degree of self sufficiency, voluntary simplicity, and environmentally-conscious design into my life as a would be urban homesteader.


Showing posts with label Recipes. Show all posts

Monday, January 16, 2012

Sauerkraut


The art of preserving vegetables by fermenting them is something that goes back thousands of years, and is prevalent in cultures around the world. Considering my family's strong German heritage, it's sort of strange that I've never really learned how to make Sauerkraut before now. The process is incredibly simple: shred or chop vegetables, add salt, squash to release the veggies' juices, top off with some water, cover it, and let it set. As the vegetables ferment, the beneficial microbes and bacteria that are present help to break down the ingredients, preserve it, and make it easier to digest when you eat it. If you cook or can it, all of those organisms are killed. I decided to make my kraut with some carrots and radishes, along with the cabbage. Why? I had them sitting around and I thought it might be good.

I cut the veggies coarsely with a kitchen knife

I used coarse kosher salt to mix them in a large bowl.

This is what the mixture looked like after a few minutes of squeezing. There was a fair amount of liquid that formed as a result of this.

I put it all into this large jar and topped it off with a little water. I used a small plate and a cup to keep the veggies submerged. I covered it with a thin dish towel, and let it sit in my basement for about 3-4 weeks.

Once the Kraut was fermented, I put it into mason jars to keep in the fridge. From 2 cabbages, a handful of carrots, and 6 big radishes I ended up with 2 1/2 quarts of Sauerkraut.

The fermented Sauerkraut is crisp, tangy, and delicious.

I'm not certain how long this stuff is good for in the fridge. At the rate I've been eating it, I don't think I'm going to find out. It's darn tasty. Making it in smallish batches like this seems to be the smart way of doing it. Cabbages and root vegetables store really well on their own, and this is something that lets you make use of them throughout the year. Below is a video featuring the eclectic fermentation guru, Sandor Katz (who may or may not have been the narrator for the infamous "Honey Badger" video). It lays out the process that I followed pretty clearly.


Sunday, November 20, 2011

Hot Sauce


Spicy food occupies a special place in my palette. Chili, Indian food, chicken wings, pizza. eggs, you name it - the hotter the better. Next to tomatoes, I have more varieties of hot peppers than any other plant. I'm always looking for different things to do with them. I found a recipe in Mother Earth News for a Tabasco brand-style hot sauce. Personally, Tabasco isn't my favorite type of hot sauce, but the recipe sounded interesting. It called for fermenting the peppers in brine for 4-5 weeks. I chopped a bunch of jalapeno, tobago, and pablano peppers, mixed in some salt and water, and let them sit. After 4 weeks, I mixed in a little white wine vinegar and let it sit for another week. In the end, this is what it looked like.


I tasted the liquid. I was spicy and very salty. The recipe was rather ambiguous about the amount of salt to add, and apparently I added a bit much. Undeterred, I strained the mixture through a cloth to separate out the pepper bits and seeds. I then used a makeshift sieve to get all of the seeds out of the pulp.


I heated the pulp, and mixed in some tomato paste, honey, brown sugar, coriander, and ginger. As per usual, I was making this up on the fly. I was hoping for something sweet, spicy, and vaguely exotic. It came out pretty good. Thin enough to mix into soup, but thick enough to put on a sandwich. I liked it enough to call it a success.
The liquid was a different story. It was so overwhelmingly salty that I wasn't sure what to do with it. I heated it up to boiling, added butter and sugar in an effort to balance the flavor out some. Ummm... I suppose it worked. The sauce was less salty, but calling it good might be a bit of an overstatement. I kept it, but I'm still not sure what I'm going to do with it. I the future, I'm going to use far less salt in the brine. Here's the final product:


This is a link to the original recipe at Mother Earth News. The article promises to help you save money. To be honest, I'm not sure how much hot sauce you need to consume in order to save an appreciable amount of money by making your own. At any rate, give it a try and enjoy!

Saturday, July 30, 2011

Homemade Ice Cream

Homemade vanilla ice cream with cinnamon, corriander, and some local honey

I have a variety of vices and low-level addictions, chief among them beer and ice cream. My brother Rob has periodically brewed his own beer, and does a pretty good job. It's something I'd like to try at some point, but I don't have any of the equipment right now. Besides, there are lots of great local and regional microbrews at the grocery and liquor store.

Ice cream is a different story. There are some great places in St.Louis to go get good, hand-made ice cream; Ted Drewes, Serendipity, and Frostbite. At the store, however, I'm pretty much stuck with mass-produced "frozen dairy dessert" made with various conditioners, emulsifiers, preservatives, artificial flavors and colors, and let's not forget high fructose corn syrup. I ate it, because, well, I love ice cream.

A couple of weeks ago, while rummaging through the basement, I came across an ice cream maker that my parents had left here. Since I have a penchant for doing things the hard way, I immediately swore off store bought ice cream and vowed to make it myself. The churn had a recipe book with it, so I tried the "Old Fashioned Vanilla Ice Cream". Wow. I remember having home made ice cream a few times as a kid, but this stuff was dynamite! My wife and kids loved it too. Better still, based on the quantity that you get, it's cheaper than the premium ice cream at the grocery store. It's safe to say that this is the only ice cream that we're going to have around our house anymore.

Here's the recipe, give it a try!

Old Fashioned Vanilla Ice Cream
This recipe makes 5 quarts of ice cream. Keep in mind that the average carton of ice cream at the store is only 1.5 quarts, so make sure you have enough containers to keep it in.

Sugar 3 cups
Flour 1/2 cup
Salt 1/4 teaspoon
Milk 6 1/4 cups
Eggs 5
Whipping
Cream 5 cups
Vanilla
Extract 2 1/2 Tablespoons

Combine the sugar, flour. and salt in a large saucepan. Stir in the milk. Cook over medium heat for about 15 minutes, stirring constantly.
Whip the eggs in a bowl. After the milk mixture is cooked, mix 1 - 2 cups of it into the beaten eggs. Pour the eggs back in with the milk and stir thoroughly.
Put the mixture into the freezer for 45-60 minutes to cool off. Stir occasionally. Once it is cool, pour the whipping cream and vanilla extract into a bowl and mix. Add in the milk mixture, and stir with a wire whisk. (At this point, you should add any spices or liquid flavorings you are using.)
Pour the mixture into the ice cream maker and churn for around 45 minutes. When the churning is done, pour it into whatever container(s) that you will be freezing it in. At this point, it is the consistency of a thick milkshake, so it's perfect for adding fruit pieces, candy, or brownie bits. Put is in the freezer for a couple of hours to get solid. Enjoy!

Tuesday, November 16, 2010

My Grandma's Coffee Cake


Working in a school, there are often snacks or treats around at faculty meetings and in our small devotion groups. They are almost always either doughnuts or store bought snack cakes. The doughnuts vary in quality. I hate Krispy Kremes with a passion, but if we're lucky someone will stop by Donut Delight. They make the best doughnuts in St.Louis, especially apple fritters. I refuse to eat the Little Debbie cakes that kids insist on bringing to small group. I find a twisted sense of humor in reading the ingredient list and nutritional information to the kids while they're joyfully cramming swiss cake rolls in their mouths.

This past week I volunteered to bring food to our morning faculty meeting, and I decided to use the opportunity to introduce my coworkers to a long time tradition in my family - home made coffee cake. One of my earliest memories of my Grandma Lorenz is the baked goods that were always at her house. Cookies, rolls, bread, and especially coffee cake. I'm embarrassed to admit that this was the first time that I've ever used her recipe myself. The family cook book has a basic coffee cake dough recipe that can be topped with just about anything. One batch is enough for about 4 coffee cakes at 11x14 inches each. You can also use this dough to make her amazing pineapple cinnamon rolls (which I did). One coffee cake's worth of dough will make 8-10 rolls.

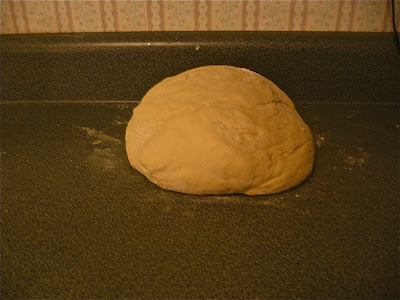
Once the dough has been kneaded, it needs to sit and rise for about an hour (or until it doubles in size). I dusted the counter with flour and covered the dough with a damp towel.

Once it has risen, you need to divide the dough and roll it out. I try to roll it to about 1/4" thickness. I placed it in greased baking pans and pressed around the edges to create a crust. You then let the dough rise again until it has doubled in thickness. This took about 45 minutes. If you are using a fruit topping, then you can put on the fruit and crumb topping after it is done with the second rise. If you are making Peanut Butter coffee cake, then you would poke a bunch of holes with a fork to prevent large air bubbles from forming.

At this point you can put the coffee cakes into the oven. The recipe is rather vague about baking time saying only, "bake until done". Mine were in there for about 30-35 minutes.

The finished product. Peach is on the left and Peanut Butter is on the right. I spread the peanut butter topping on the cake after it had cooled. Cut into 1.5" strips and demolish them with coffee or elderberry tea.

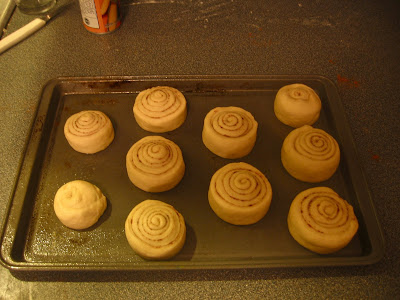
To make pineapple cinnamon rolls, roll the dough out the same way that you would for coffee cake. Brush some melted butter onto the dough and sprinkle liberally with cinnamon and sugar. Use a pizza cutter to cut the dough into 1.5" strips and roll them up. Pinch the end smooth.

Once the rolls are rolled up, they need to sit and rise for about 45 minutes. I scooted them closer together on the pan, and spooned the pineapple topping over them. Bake them for 35-45 minutes, depending on how thick they are.

It's hard to tell in the picture, but after the rolls come out of the oven and have cooled down, I poured a simple powdered sugar glaze over them. Delicious for breakfast, lunch, supper, snack, in the car, in the shower, middle of the night...